Skinet Inventory Tutorial
Creating the admin catalog content
In this lesson we will create the table to display the orders to the admin user that will allow that person to view the product catalog in tabular form. Open the admin-catalog.component.ts and add the following code:
import { Component, inject } from '@angular/core';
import { PageEvent } from '@angular/material/paginator';
import { ShopService } from '../../../core/services/shop.service';
import { Product } from '../../../shared/models/product';
import { ShopParams } from '../../../shared/models/shopParams';
import { CustomTableComponent } from '../../../shared/components/custom-table/custom-table.component';
import { MatButtonModule } from '@angular/material/button';

@Component({
  selector: 'app-admin-catalog',
  standalone: true,
  imports: [
    CustomTableComponent,
    MatButtonModule
  ],
  templateUrl: './admin-catalog.component.html',
  styleUrl: './admin-catalog.component.scss'
})
export class AdminCatalogComponent {
  products: Product[] = [];
  private shopService = inject(ShopService);
  productParams = new ShopParams();
  totalItems = 0;

  columns = [
    { field: 'id', header: 'No.' },
    { field: 'name', header: 'Product name' },
    { field: 'type', header: 'Type' },
    { field: 'brand', header: 'Brand' },
    { field: 'quantityInStock', header: 'Quantity' },
    { field: 'price', header: 'Price', pipe: 'currency', pipeArgs: 'USD' }
  ];

  actions = [
    {
      label: 'Edit',
      icon: 'edit',
      tooltip: 'Edit product',
      action: (row: any) => {
        console.log(row)
      }
    },
    {
      label: 'Delete',
      icon: 'delete',
      tooltip: 'Delete product',
      action: (row: any) => {
        console.log(row)
      }
    },
    {
      label: 'Update quantity',
      icon: 'add_circle',
      tooltip: 'Update quantity in stock',
      action: (row: any) => {
        console.log(row)
      }
    },
  ];

  ngOnInit(): void {
    this.loadProducts();
  }

  loadProducts() {
    this.shopService.getProducts(this.productParams).subscribe({
      next: response => {
        if (response.data) {
          this.products = response.data;
          this.totalItems = response.count;
        }
      }
    })
  }

  onPageChange(event: PageEvent) {
    this.productParams.pageNumber = event.pageIndex + 1;
    this.productParams.pageSize = event.pageSize;
    this.loadProducts();
  }
}
In this component we are simply using the existing shop service to get a paginated list of products and are creating the columns and actions array we need to pass to the custom table.
Open the template for this component and add the following code:
<div class="flex justify-between items-center mt-2">
  <div class="text-2xl font-semibold mt-4">
    Admin catalog
  </div>
  <button mat-flat-button>
    Create new
  </button>
</div>

<app-custom-table
  [columns]="columns"
  [dataSource]="products"
  [actions]="actions"
  [totalItems]="totalItems"
  [pageSize]="productParams.pageSize"
  (pageChange)="onPageChange($event)"
/>
Once again, we are using the custom-table to create our table and passing the columns and actions to this, as well as the list of products and pagination data.
Update the admin.component.html and add this new component to the template (also add the import for this into the component):
<div class="min-h-screen">
  <mat-tab-group class="bg-white">
      <mat-tab label="Orders">
          <app-admin-orders />
      </mat-tab>
      <mat-tab label="Catalog">
          <app-admin-catalog />
      </mat-tab>
      <mat-tab label="Customer service">
          Customer service
      </mat-tab>
  </mat-tab-group>
</div>
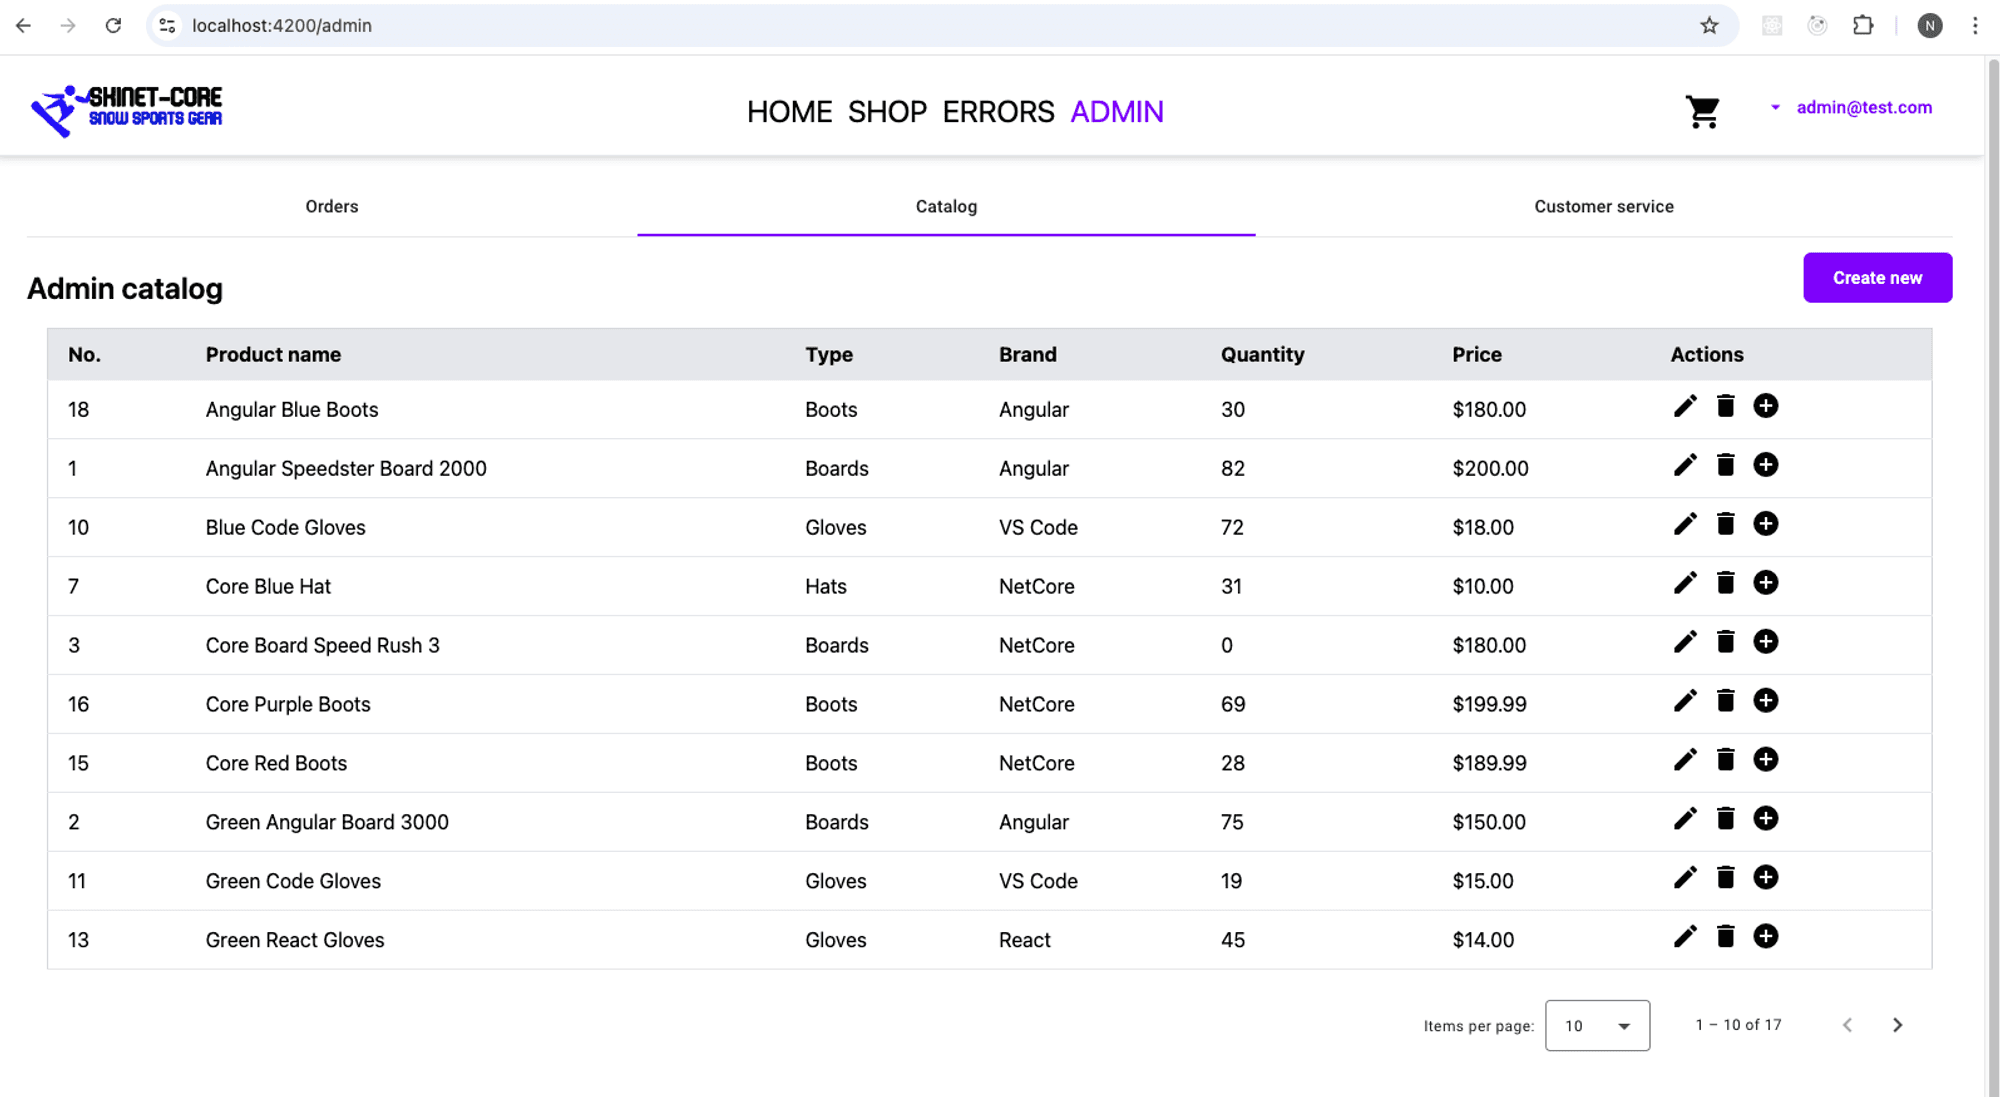
If you browse to the admin page catalog tab you should now have the following:
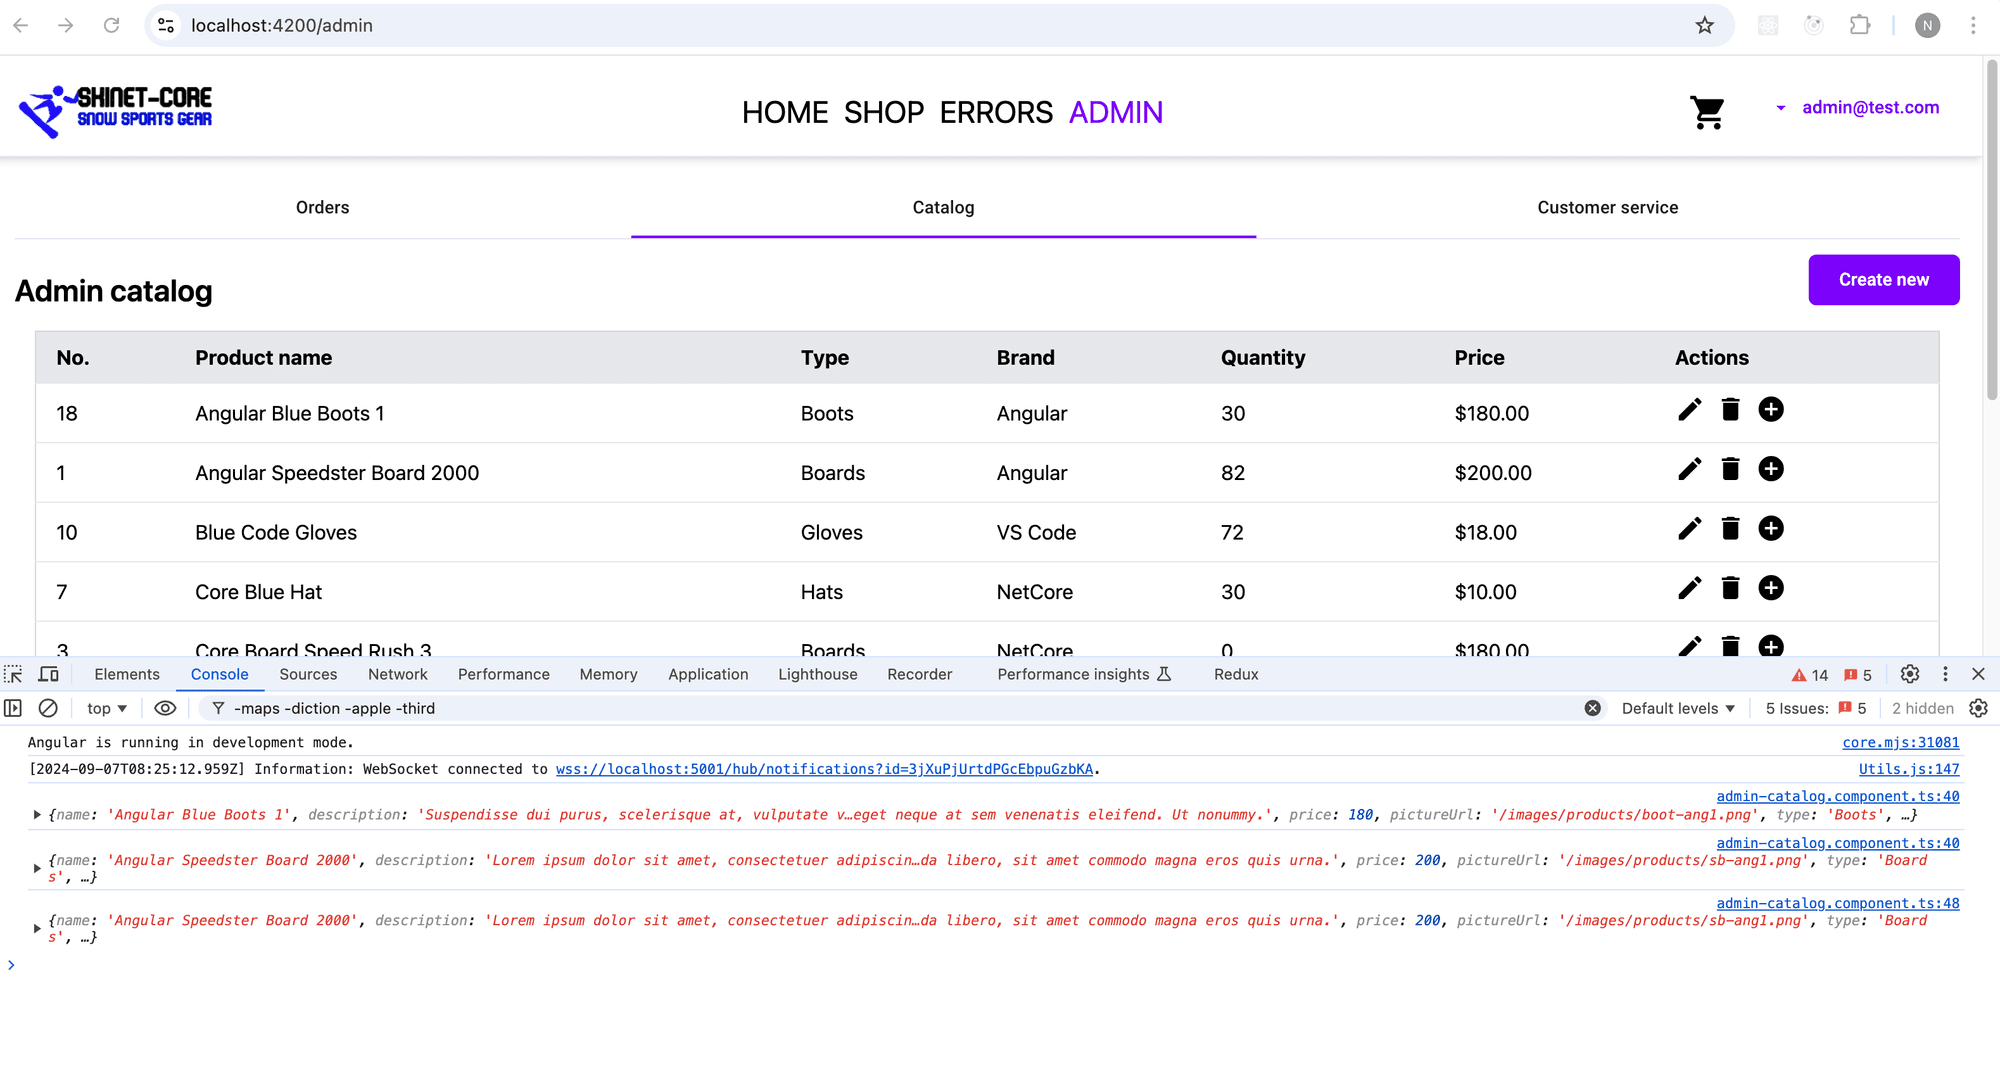
If you click on any of the buttons you should see the output in the console of chrome dev tools.
That’s it for this lesson. In the next we will look at creating the product form.
Comments
Loading comments...